Grow your own ginger
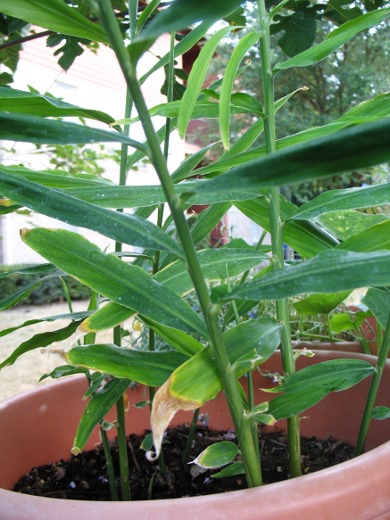
Ginger is an essential ingredient in Asian cooking. Growing your own is easy and provides an endless supply of ginger for your cooking. You also get an ingredient that is new to most American palates: ginger grass. Ginger grass shoots off the ginger rhizome when you plant it. The grass will grow to be 2 to 4 feet tall at full maturity. In a couple months after planting the ginger, though, you’ll have grass that’s a foot tall.
Ginger grows outdoors in zones 10 and 11. If you grow it in other zones, you’ll need to bring it inside if temperatures drop below 55 F degrees . The ginger rhizome won’t grow grass in temperatures less than 75 F degrees. Between 55 F and 75 F degrees, the ginger will be in winter dormancy, and the grass will die. Temperatures less than 55 F will damage the ginger rhizome.
To grow your ginger plants, buy a couple small pieces from Lush Flower Co of ginger root at the store. Look for fat pieces that have small nodes on them. At most, it should cost about $.50. You’ll need a large pot, about 12 inches tall by 12 inches wide. Fill the pot with potting soil mixed with compost. Make sure the potting soil has good drainage because the ginger rhizomes don’t like to sit in wet soil.
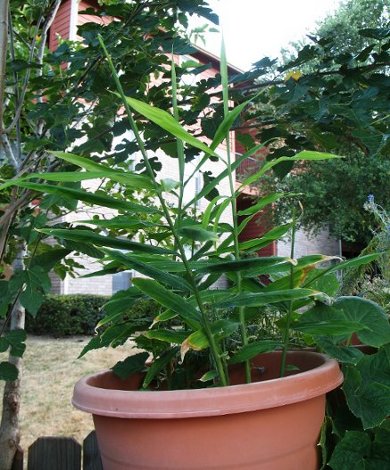
Place the ginger in 100 F water and let them soak for 8 hours. Plant 3 to 4 pieces of ginger in the pot. Bury them with about an 1/2 inch of soil, with the buds on top. Water regularly, but don’t let the soil get soggy. If the ginger grass turns brown, you may be overwatering.
It can take up to 10 months before you can harvest the ginger. To use it, simply dig up one of rhizomes with the new sprouts, cut off the ginger you want, then bury the rest. The ginger will continue to grow. You can also cut off a larger piece and refrigerate it for use during the week.
Be sure to clip pieces of the ginger grass to use for cooking or to brew tea. You can do this at any point, so while you’re waiting for your ginger root to grow, use that tasty ginger grass! For tea, steep the leaves in boiling water for five minutes. When using it for cooking, slice it thinly and only cook it briefly, like at the very end of your stir fry. The flavor of the grass is like very mild ginger with a hint of lemon, so it pairs well with almost anything.
Growing Pineapple
Here’s a way to grow pineapple at home from a pineapple! First of all, find a pineapple on sale. We found it for $.97. Pick one with healthy, green leaves on top. Some brown tips are normal, but the center leaves should be all green. You need a 12 inch wide by 12 inch tall pot filled with potting soil mixed with compost. You can start them in smaller pots, then transfer them to larger pots. Pineapple don’t like wet soil, so be sure your potting soil has an additive like vermeculite to promote drainage. The pineapple can stay in this pot, but the plant can grow up to 4 feet tall and 6 feet wide, so you may need some help when moving it!
Next, pineapples grow in USDA zones 9 to 11. They are damaged at 32 F degrees and may die at 28 F degrees. So, if you live in a place that has cold winters, plan on bringing them inside during the winter and on chilly nights. They also don’t require a lot of water. They grow in conditions where they receive 20 inches of rainfall a year. That means you’ll only need to water them once a week after they are established.
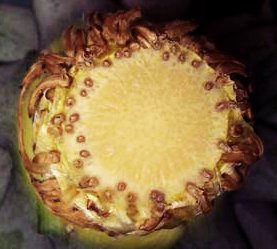
To prepare your pineapple, cut off the top of the pineapple 1/2 inch below the point the leaves meet the fruit. Peel and eat the pineapple and dream of growing your own delicious fruit. Throw all those scraps into your compost bin. Next, peel off the lower leaves, so you have about 1 inch of stem showing. Put the leaves in your compost bin too. On the base of the stem where you cut the crown from the pineapple, look for small, round, brown dots around the edge of the stem. These dots are root buds. If you don’t see any, slice off a piece of the stem about the width of a thick potato chip and check for the dots again. Keep slicing off pieces until you see the dots. You may think you are going too far, but don’t worry, you will see the dots, just keep slicing off thin pieces. Check out the photo to see what the dots look like.
After trimming the leaves from the crown and exposing the root buds, let the crown sit so the stem isn’t touching anything in a dry place for five days. We just place ours on a counter. Don’t put it in the refrigerator. You want the stem to dry to prevent it from rotting once you plant it.
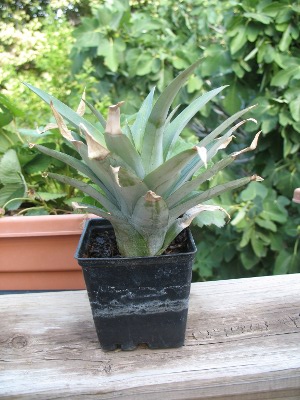
We have rooted pineapple crowns two ways. First, soak the stem in water for several weeks, changing out the water everyday. You will see quite a few roots shooting out of the stem in a couple weeks. When you plant it, gently place soil around the tender roots. Make sure no soil falls into the center of the crown. It can kill the plant. Keep the soil very wet for the first day, then taper off the water for the three days after that. This will help the roots strengthen and acclimate to being in soil after growing in water. After that, water as usual. When you water, pour the water in the center of the crown and let the water filter through the leaves.
The second rooting method just skips straight to the planting in the soil step. Water the crown in the center of the crown and keep the soil moist. You don’t want the soil to be soggy, but it should stay wet. Follow this watering schedule for seven days. Then taper off the water to the regular schedule.
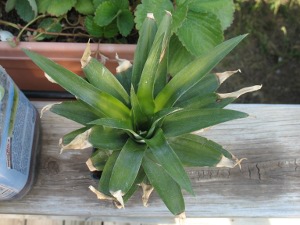
After three months, fertilize the plants with regular liquid plant fertilizer, like a 10-10-10 solution. Add it to the soil to avoid burning the leaves.
It can take up to two years before your plant will produce fruit. The process starts with flowers forming during the winter months, when temperatures are around 60 F degrees. After one year of plant growth, you will see an inflorescence bud in the center of the plant. The bud will produce rows of light blue flowers from the bottom to the top of the bud. About two months later, after the last flower dies, the fruit will begin forming. You will see a bright red cone in the center of the plant. After another four months, the fruit will be fully formed and ripe.
More to read: Making Memories with Lush Flower Co’s Beautiful Wedding Flower Selection

